

As soon as Link has pulled the Master Sword out of its base in the Korok Forest, the ultimate challenge for the legendary blade awaits with the test of the sword. The DLC side quest therefore fits perfectly into this part of our Breath of the Wild Walkthrough. In three increasingly difficult tests, Link has to survive numerous battle rooms – without his usual armor, without the weapons he brought with him, without food from the inventory and without the abilities of the Champions. Everything you need to survive must be found within the trial.
The reward for this is extraordinary: After the beginner test the basic strength of the master sword increases from 30 to 40, after the advanced test to 50 and after the master test permanently at 60. The sword is then permanently in its awakened state. It can continue to use up all of its energy and must then regenerate for around ten minutes, but its enormous base strength and greatly increased durability make it one of the most reliable weapons in the game.
Nintendo officially speaks of 45 combat rooms. If you also count the six relaxation rooms and the three final rooms Master Sword added, you traverse as a whole 54 levels. You don’t have to complete all three tests in a row: after each stage you pass, Link returns to the forest Koroks back, can save and start the next test separately later. However, there is no save point within a single exam level. If you die, this stage starts over again.
The Trial of the Sword is part of the first expansion pack. You can find an overview of the additional content on ZeldaCollection under DLC content in Breath of the Wild.
Side Quest Start “EX: Trial of the Sword”
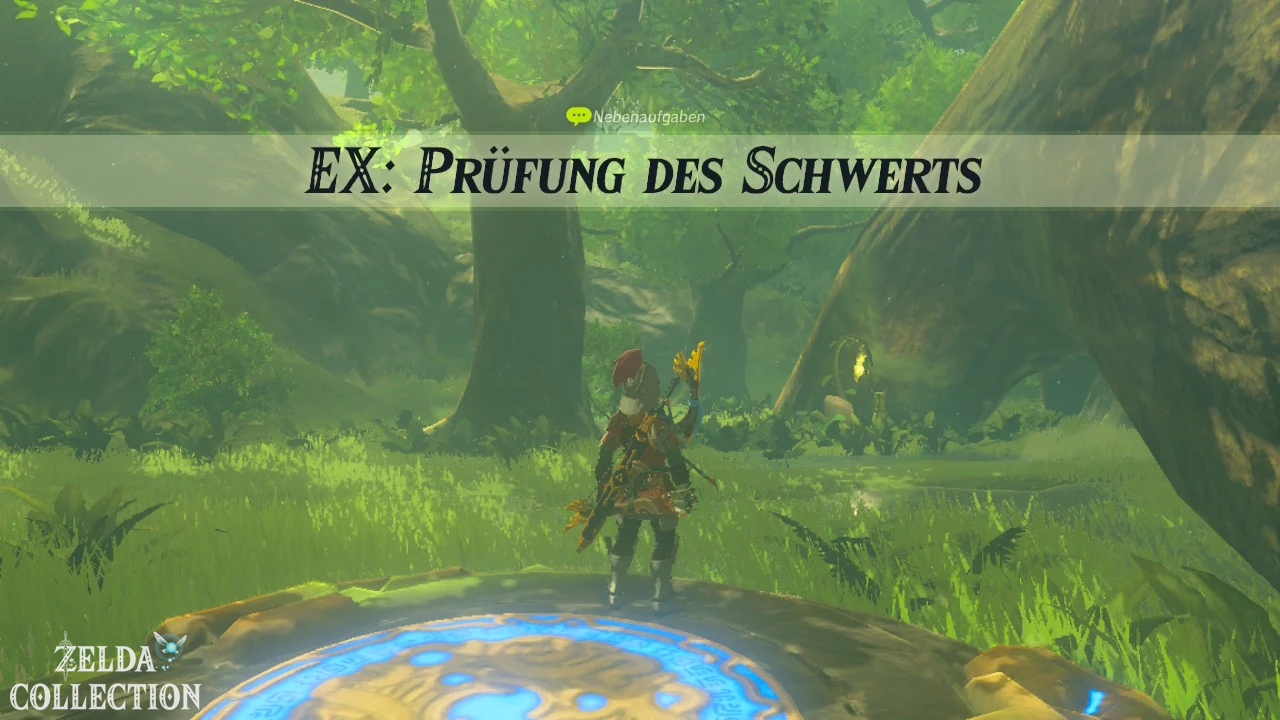
After receiving the Master Sword, a mysterious voice speaks after changing areas or fast travel. Then return to the Koroks Forest and examine the pedestal from which you pulled the Master Sword. Link puts the blade back in and is teleported to the first test.
Once a trial begins, all normal weapons, bows, shields, armor pieces, ingredients, and dishes will disappear from your available inventory. Of course, after you return to Hyrule, you will get everything back. Mipha’s Grace and Revali’s Gale are also not available during the test. Your Heart Container, stamina, inventory slots, Sheikah modules and already active food effects however, remain preserved. This is exactly where the most important advantage of good preparation lies.
The best preparation for the
sword exam
Immediately before the start, eat a maxi meal that increases your health up to as much as possible 30 hearts. Even a single maxi durian or maxi truffle heals completely and creates additional hearts; several maxi ingredients provide correspondingly more yellow hearts. Yellow hearts will not be removed upon entering the exam.
We then recommend a attack bonus level 3 for 30 minutes. A Horn Shard from Dinraal, Naydra, or Farosh extends a matching food effect to half an hour. For example, four Mighty Bananas combined with a Dragon Horn Shard provide an excellent long-term attack boost. If you get hit a lot, you can cook a 30-minute level 3 defense bonus instead. Attack is usually more effective for our route because enemies die faster while saving weapon durability.
You can find the Locations of the required dragons and their horn shards in our guide to Dinraal, Naydra and Farosh. Additional cooking ingredients are listed under Ingredients and Materials.
Stasis+ and the improved bomb module also pay off enormously. Remote bombs then cause more damage and reload faster; Stasis+ can temporarily freeze normal enemies, creating safe windows for headshots or melee combos. The Sheikah Sensor+ can also be set to Treasure Chests and helps not miss hidden equipment within the trials.
Basically, the following applies during all three test levels: If possible, blow up wooden boxes and barrels with bombs instead of weapons, pick up every arrow, collect every food and take your time after the last enemy on a level before entering the teleport field. The equipment is deleted when you leave a trial level anyway – within the trial, however, a single additional bow or healing item can mean the difference between victory and a restart.
Trial of the Sword – Beginner Trial
The beginner’s exam consists of twelve actual levels and a final room. Level 7 is a relaxation room. The first sections take place in a forest environment, then it goes into several watery arenas. The most dangerous places are level 10 with the Lizalfos and level 12 with a blue Hinox.
Beginner Exam – Level 1
Three Bokoblins sit around a campfire. Practically no weapons are wasted here. Throw a round long-range bomb into the middle of the group and detonate it as soon as all enemies are close enough. Survivors Bokoblins can be eliminated with a second bomb. Then collect all the weapons in the camp and blow up the wooden crates and barrels for food.
[Optional – Food] Climb the thick tree and take the bird eggs from the nest. Roasted game also hangs over the campfire. Since this fire is the last convenient cooking option for several levels, you can briefly put apples you find into it and use them again as roasted apples. However, raw ingredients can also be cooked in the rest room later.
Beginner Exam – Level 2
One fire slime and four Bokoblins spread across raised wooden platforms. First stay behind the big trees and kill the fire slime with a bomb. Then throw round bombs onto the platforms. The archers in particular should be eliminated as early as possible. If you only have one archer left, you can intentionally shoot his arrows into a tree and then collect them. In this way, you can build up a comfortable supply of arrows early on.
After the fight, take your traveling sword, shield and bows with you. Also check all boxes – arrows are much more valuable for the later water levels than weak melee weapons.
Beginner Exam – Level 3
Several normal and fire slimes appear here. Remote bombs take out almost the entire level. Keep your distance when a fire slime explodes, as the resulting flames can cost Link a surprising number of hearts without armor.
[Optional – Treasures] Behind your starting position there is an elevated chest with one Boomerang, there is another one on the opposite wall five fire arrows. Burning grass or exploding fire slime creates updrafts. Open the Paraglider and let yourself be carried to both chests before the flames go out.
Beginner Exam – Level 4
A larger Bokoblin camp awaits you. Don’t go in the middle. First sneak up on the right edge to the individual enemies and kill archers with headshots. The bomb barrels in the camp can do a lot of the work. Throw a bomb or a fire arrow into it and retreat immediately.
The blue Bokoblins can withstand much more. Use Stasis+ and focus on one enemy at a time. Metal crates can be dropped from great heights using Magnesis and also cause significant damage. Then open and destroy all the boxes; here you can get a large amount of normal arrows and several Fire Arrows.
Beginner Exam – Level 5
Two Moblins patrol in front of a skull cave with three blue Bokoblins. Run to one of the large trees and use it as an elevated bomb position. Fire Arrows on the bomb barrels inside the skull cave do enormous damage without Link having to enter the narrow entrance.
Lure the Moblins away from the camp one by one and freeze them with Stasis+. A headshot also causes a Moblin to stagger. Then pick up the more powerful Moblin weapons and Spiked Bokoblin weapons – there’s a big enemy waiting on the next level against whom we want to use our best two-handed swords.
Beginner Trial – Level 6: Stone Talus
A Stone Talus is the first miniboss. First go around it and position the bomb barrels standing around so that you can cause additional damage. Once the Talus awakens, throw bombs at its arms. If both are destroyed, he falls over and Link can climb onto his back.
Equip your strongest two-handed weapon there and hold Y for a spin attack. Hit the ore deposit until the talus stands up again and jump down in time. Repeats the process. If you want to conserve your weapons, you can sometimes use bombs and arrows to attack your opponent from the tree.
Beginner Exam – Level 7: Rest Room
Don’t immediately run to the Treasure Chests. First sneak up to the fairy and collect her. A fairy automatically revives Link if his health is completely depleted, making it more valuable than almost any weapon in the room.
The three most important pieces of equipment are a Sheikah Sword, a Serpent Lance and the Shield of Inner Contemplation. Also collect Armor Carp, Swordlings, Armorlings, Meat, Acorns and all the ingredients from the crates. Cook normal healing ingredients, because cooked food heals significantly more than raw food. If your 30-minute buff is almost up, you can use the appropriate mushrooms or fish to create a new, shorter attack or defense bonus.
[Optional – Survival Trick] Trees can be felled with bombs and then blown up again to get bundles of wood. A single bundle of wood can be cooked to produce rock-hard food that heals a quarter of a heart. This is slow and only worth it if you really want to squeeze out every possible healing – always cook wood individually, because multiple bundles in the same dish still only heal a quarter of a heart.
Beginner Exam – Level 8
Several Lizalfos and a large Electro Slime are spread out on small islands. Shoot the electro-slime from a safe distance. The explosion can stun surrounding enemies. Then get the javelin from the ground before one of the blue lizards picks it up.
Fight the Lizalfos one at a time. Stasis+ is particularly valuable here. Avoid throwing enemies far into the water with bombs – Lizalfos are excellent swimmers and can constantly annoy Link with jets of water from there. There are fried fish and additional arrows on an island. Take everything with you.
Beginner Exam – Level 9
Two Water Octoroks and an Electric Pyromagus guard the plain. First turn off the Octoroks with the bow. A Treasure Chest lies between rocks in the water and can be raised with a cryo module; there are additional arrows inside.
Against the Electric Pyromagus, use a high rock as a starting point, jump off and hit him in the head during the bow slow motion. As soon as he is on the ground, follow up with a strong weapon. Don’t let him start a thunderstorm spell. If it does happen, remove metallic equipment until the storm has passed.
Be sure to take his electric baton with you. His ability to shock and disarm opponents is gold at the next level.
Beginner Exam – Level 10
This level is one of the most dangerous of the entire beginners’ test: A blue and two black echsalfos stand on a narrow footbridge above the water. Kill the first enemy as quickly as possible with a headshot before everyone attacks at the same time. Then use the electric staff from level 9. An electric hit forces Lizalfos to drop their weapons and gives you a valuable attack window.
Consistently focus on one enemy until they are dead. If a black lizard is thrown into the water, climb onto the round platform and shoot at it from there. With Cryomodule you can create additional elevated positions and fire slow motion shots from the jump.
[Master mode] In master mode, instead of the black variants, there are silver echsalfos whose health regenerates. This makes this level notorious. Kill the first weak Lizard immediately, then sneak up on a Silver Lizard and use Sneakstrikes or Stasis+ and concentrated attacks. Never leave the enemy undamaged for a long time, otherwise he will regenerate.
Beginner Exam – Level 11
There is a large Bokoblin camp in the water in front of you. Multiple archers fire Fire Arrows from towers. Eliminate these enemies first. The raft at the start automatically moves to the main camp and cannot burn. Use the Korok Fan if you need to correct its direction.
The black Moblin in the main camp is the most dangerous opponent. If possible, throw him into the water with bombs or a heavy weapon – Moblins can’t swim and die instantly. The same applies to Bokoblins.
[Optional – Treasures] To the left are several small platforms with a metal chest full of Fire Arrows. Another chest is between three rocks in the water and contains ten Electro Arrows. Creates Cryonis blocks and then pulls them out with Magnesis.
Beginner Trial – Level 12: Blue Hinox
The blue Hinox is the last enemy of this stage. Before you wake him, examine the surroundings. There is a large metal box under the water that can even be used as an improvised weapon with Magnesis. Palm fruits on the trees provide additional healing.
Shoot the Hinox in the eye and immediately run to his legs. Equip your strongest two-handed weapon and launch a charged spinning attack. As soon as he gets back up, retreat. Stasis+ makes the next eye hit particularly easy because the Hinox cannot protect its eye during the short period of stare.
Repeat this process until it falls. Don’t save any high-quality weapons for “later” – the final room follows this level.
beginners exam – completion of
In the last room the Master Sword is waiting on a pedestal. Pull out the blade and Link returns to the Korok Forest. The Master Sword’s base attack power increases from 30 to 40. You can now save, use your normal equipment again, and begin the Advanced Trial immediately or later.
Trial of the Sword – Advanced Examination
The advanced exam includes 16 exam and relaxation rooms as well as a final room. The first four levels revolve around constant updrafts and dogfights, levels 6 to 10 are almost entirely in the dark, and the final section consists of battles against nano-guardians. The two relaxation rooms are on levels 5 and 11.
Advanced Exam – Level 1
Several Bokoblins stand on floating platforms above a bottomless abyss. Permanent updrafts carry Link upwards. Use this mechanic offensively: Open the Paraglider, gain height and draw the bow. Slow motion headshots are much safer than close combat.
Bombs are also carried by the updraft. Throw it just under a platform and let it rise to the enemy. This allows you to save weapons. Collect all the bows and arrows before moving on.
Advanced Exam – Level 2
Bokoblins and several Fire Pyromagi or Meteor Pyromagi float between the platforms. Focus on the mages first, as their area attacks quickly make the arena confusing. Let the updraft carry you up and take headshots in slow motion.
If an opponent falls into the abyss, he is immediately defeated. Therefore, try to knock Bokoblins off their platforms with bombs or strong hits instead of using up valuable weapon durability.
Advanced Exam – Level 3
Seven Bokoblins guard several platforms, including archers with dangerous special ammunition. First target the enemy in the middle, who can use bomb arrows or particularly powerful arrows. Don’t jump straight into the group. Work your way from the outside in.
The constant updrafts allow almost unlimited slow motion shots. Use short arcing phases and then immediately open the Paraglider again so that your stamina regenerates. Collect arrows and more powerful Bokoblin weapons.
Advanced Exam – Level 4
A dilapidated guard waits on a small platform. You can return his laser with a perfect shield parry, but a mistake will cost you a lot of hearts without armor. It is safer to use the updraft and repeatedly shoot arrows directly into the eye. Then land on the guard and destroy him with melee attacks while he is stunned.
Collect all the boxes and arrows. Immediately afterwards comes the first relaxation room.
Advanced Exam – Level 5: Quiet Room
First sneak to the fairy. Then open the three Treasure Chests. You get a knight’s sword, Hylian trousers and a falcon bow. Put on the Hylian pants immediately – even a few additional defense points noticeably reduce the damage of the following dark levels.
Catch the Hyrule bass from the pond and collect all the ingredients. Cook yourself completely healthy. Due to its high arrow speed, the Falcon Bow is an excellent weapon for the next opponents and should not be wasted on weak slimes.
Advanced Exam – Level 6
The next five levels are almost completely dark. Five Fire Keese and a large electric slime are waiting in the immediate area. Stay at the starting point until your eyes adjust to the darkness. Shoot the large electric slime from a distance; its discharge can hit multiple Keese at the same time.
Stasis+ is an excellent search device: activates the module and slowly moves the crosshairs through the darkness. Enemies are highlighted even if you can barely see their bodies.
Advanced Exam – Level 7
Two fire echsalfos and two blue echsalfos are in the darkness. If possible, attract them individually to a fire pit. Fire Lizalfos can be taken out immediately with ice attacks if you have found the appropriate ammunition. Otherwise, she stuns with headshots and then follows up in close combat.
After the last enemy, take your time to collect all the weapons. The next level has a strong Pyromagus and significantly more resilient enemies.
Advanced Exam – Level 8
A Meteo Wizzrobe and several Bokoblins wait behind ruins. The magician has top priority. Jump from an elevated point and deliver a headshot in slow motion. Immediately continue to attack before he rises into the air again.
You can then attract the Bokoblins individually. Use light sources and Stasis+ to avoid being hit unexpectedly from the side. Take the powerful Pyromagus Fire Rod with you.
Advanced Exam – Level 9
A dilapidated guard stands in complete darkness. Its red aiming laser reveals its position from a great distance. Hide behind a tree or ruins until you are close enough. Stasis+ or an arrow to the eye interrupts his attack. You can then destroy the machine at close range.
If you can make perfect parries safely, you can reflect the laser and thus save weapon durability. However, only risk this if you really have mastered the timing.
Advanced Exam – Level 10: Black Hinox
The black Hinox initially sleeps in the dark. Use Stasis+ to clearly see his position. Before you wake him up, get a good two-handed sword ready. An arrow to the eye knocks him down, then you spin on his legs with a charged two-handed attack.
Repeats headshot and melee. The Hinox carries weapons on its necklace that can fall during combat. Collect them as soon as it is safe to do so. After victory, the darkness disappears.
Advanced Exam – Level 11: Second Rest Room
First sneak up to the two fairies. The three chests contain a Forest Sword, a Forest Lance and a Hylian Robe. Put on the robe along with the Hylian pants. Defense helps significantly in the guard section.
Collect all Hyrule bass and ingredients and cook the most efficient healing dishes possible. You don’t need elemental resistance from now on. Instead, prepare for a series of direct combat tests.
Advanced Exam – Level 12
Six weak Nano Guardians surround a watery arena. They die after just one perfect laser parade. If you want to avoid the risk, use the cryomodule to create elevated positions, jump down and shoot at their eyes in slow motion mode.
[Optional – Treasure] A chest with ten arrows is on a raised platform and can be reached with Cryomodule. Be sure to take the arrows with you.
Advanced Exam – Level 13
Three armed Nano Guardians are much more aggressive. Don’t fight all three at the same time. Lures an enemy from the group, freezes them with Stasis+ and uses Flurry Rushes or quick melee combinations.
[Optional – Treasure] There is a movable metal block behind a large structure. Pull him out with Magnesis. Behind it lies a chest with a double-shot bow from the Yiga clan. The bow shoots two arrows with only one projectile spent and is extremely useful for the rest of the trial.
Advanced Exam – Level 14
Four simple and two stronger nano guardians wait at different levels. First use arrows against the weak guards before approaching the two armed men. In the water areas, enemies can be thrown in with strong hits and can sometimes be defeated immediately.
Metallic objects within the arena can be used as improvised weapons using Magnesis. Save your highest quality melee weapons for the last two levels.
Advanced Exam – Level 15
Two stronger class Nano Guardians attack at the same time. Be sure to try to separate one opponent from the other. Stasis+ on one Guardian gives you a few seconds to deal with the second one. Perfect dodges and flurry rushes are more efficient than blunt strikes.
Picks up her high-quality guardian weapons. Now you don’t have to save anything for multiple levels – only the strongest Nano Guardian of this test follows.
Advanced Exam – Level 16: Guardian Scout IV
The fight is a serious test of strength. The Guardian Scout IV uses several high-quality ancient weapons. Stay behind the stone pillars as he lunges at Link, weapons outstretched; he crashes into it and is momentarily dazed.
His melee attacks are excellent opportunities for Flurry Rushes. When the laser rotates, an updraft is created – the Paraglider opens, draws the arc in the air and hits the eye. When health is low, the Guardian charges a concentrated laser. Attack aggressively and end the fight before he can fire multiple shots.
Advanced exam – completion of
Pull the Master Sword out of the conclusion room base again. His base attack power increases from 40 to 50. Link returns to the Korok Forest and the mastery exam is unlocked.
Trial of the Sword – Master Examination
The master’s examination is the longest and most dangerous section: 23 examination and relaxation rooms plus the final room. Three rest rooms are located on levels 6, 12 and 18. In between there are thunderstorms, volcanic heat, extreme cold and finally a series of powerful guardians. The most important collectible item is nine Ancient Arrows. You can find three each on levels 6, 10 and 14. Don’t miss any of these chests.
For our optimal solution, we reserve Ancient Arrows primarily for the Lynels on level 17, the Lynels on level 23 and dangerous guards in the last rooms. An Ancient Arrow will immediately remove a Lynels from combat, but you will not receive his equipment. This doesn’t matter at all during the test – safe survival is more important.
Master’s Examination – Level 1
Four Stalbokblins appear during a thunderstorm. Metallic equipment attracts lightning strikes, so use bone and wooden weapons or long-range bombs first. Blast the skeletons apart and then destroy their heads before they reassemble.
Picks up all weapons but stores metal items in the inventory as long as the lightning bolt symbol appears on the screen. Destroy boxes with bombs and take all the arrows with you.
Master’s examination – Level 2
Two Electric Keese and three Stal-Lizalfos guard a skull camp. First kill the Keese with a spear or arrows. Then place a bomb in front of the sleeping Stal-Lizalfos and detonate it as soon as they wake up.
[Optional – Treasure] Behind a tree to the left of the Skull Cave is a chest with a Bodyguard Sword. The weapon deals enormous damage but has low durability. Save them for strong opponents. Continue to only equip metallic equipment between lightning alerts.
Master’s Examination – Level 3
Two large Electro Slimes and five Stalmoblins appear. Shoot the electro-slimes from a safe distance when there are as many skeletons as possible nearby. The electrical explosion dismantles the Stalmoblins and disarms them.
Bombs remain the best way to destroy skulls and save weapons. Then take the Moblin bones and bows with you if your inventory has enough space.
Master’s Exam – Level 4
Seven Stalbokblins ride Stalhorses. The room quickly becomes chaotic. Shoot riders from the saddle or use bombs to dismantle multiple enemies at once. You can then mount a stable horse yourself and use it to pursue the remaining opponents.
A particularly effective attack is to jump off the horse, draw your bow in the air and deliver headshots in slow motion. Here, too, you still have to pay attention to the storm.
Master Exam – Level 5: Stalnox
A Stalnox is the boss of the thunderstorm section. Shoot him in the eye and then attack his legs or body. When health energy is low, his eye falls completely out of its socket. Then concentrate all attacks on the eye before the body absorbs it again.
Particularly important are the weapons that hang on his neck or remain behind after the fight: electric sword, fire lance and ice greatsword. Take all three with you. These elemental weapons are extremely valuable for the Fire and Snow portions of the Mastery Trial.
Master examination – Level 6: First relaxation room
First sneak up to the two fairies. The chests contain anti-fire trousers, knight’s bow and three ancient arrows. The three Ancient Arrows are the most important loot in the entire room. Don’t use it yet.
Catch the armor carp from the pond and collect the two maxi truffles and all the ingredients. Cook at least one strong healing dish. Put on your anti-fire pants – the next five combat rooms are in a volcanic region. Also keep the Stalnox’s elemental weapons.
Master’s Exam – Level 7
A Fire Slime, a Rock Octorok and two Magma Rocklings wait between the lava and rocks. No need to waste valuable weapons here. Bombs eliminate all enemies. Rock Oktoroks suck in long-range bombs and explode from within when ignited.
With the magma rocks, an explosion from a safe distance is also sufficient. Stay away from the lava and collect the few arrows available.
Master’s Exam – Level 8
Three fire echsalfos are in the volcano arena. Now the ice greatsword from level 5 pays off. A direct ice attack instantly defeats a fire lizard. Use the updrafts around for headshots if the enemies are too far apart.
Use the ice weapon only for the actual elemental hit and then switch again – this leaves enough durability for later fire opponents and the Igneo Talus.
Master’s Examination – Level 9
A Meteo Wizzrobe, a Black Moblin, and two Fire Lizards guard the area. The fire echsalfos die immediately from ice again. Then you concentrate on the Pyromagus. A shot in the head brings him to the ground; follows up and then takes his meteor staff with him.
The black Moblin can be controlled with Stasis+. Stay away from the lava – if Link is hit into it, the game will reset him, often right next to the attacking Moblin.
Master Exam – Level 10: Second Ancient Arrows
Three black Moblins and a fire Lizalfos guard an elevated structure. Switch off the Lizalfos with ice and lure the Moblins down one at a time if possible. Electric attacks from the electric sword can disarm her and prevent three heavy weapons from hitting Link at the same time.
[Optional – be sure to take it with you] There is a metallic one in the lava Treasure Chest. Pull her along Magnesis out of here. The next ones are in there three ancient arrows. This means you have six. There is also a underneath or next to the metal construction Bodyguard two-handed sword. Take the powerful weapon with you for the upcoming mini-bosses.
Master Exam – Level 11: Igneo Talus
A Igneo Talus sleeps in the middle of the arena. First, blow up the rocks on the edge to reveal several updrafts. A hit with Ice Greatsword or Ice Arrow cools the Igneo Talus’s body and allows Link to climb onto it.
Equip a heavy weapon on his back and work the ore deposit. The meteor staff doesn’t help here – fire is of course ineffective. Cool the Igneo Talus again once its surface glows again. After a few passes he falls.
Master Exam – Level 12: Second Rest Room
Sneak over to the three fairies before destroying the boxes. The Treasure Chests contain a Bodyguard Shield, a Rocksplitter, and a Hylian Robe. Put on the robe along with the anti-fire pants while you are still in the warm environment.
Collect chilies and ember trout. The next five rooms are in extreme cold. Therefore, cook a strong dish with cold protection that lasts as long as possible. Alternatively, keep a fire lance or meteor staff – a drawn firearm also provides heat, but is not a substitute for a reliable food effect in every situation.
Master’s Examination – Level 13
Two Ice Rocklings, an Ice Slime and several Bokoblins are waiting in a snowy arena. Bombs are sufficient against rocklings and slime. The Bokoblins are sitting around a hotplate that has initially gone out. Fight them from a distance and use Stasis+ when a black Bokoblin harasses you.
[Optional – last chance to cook] The fire pit can be lit after the fight with the meteor staff or a fire arrow. This is the last cooking option before the third rest room. If your cold protection dish is limited, now cook the remaining chilies or other suitable ingredients.
Master Exam – Level 14: Final Ancient Arrows
First shoot the two ice slimes from a distance. The Ice Lizalfos dies instantly from a fire attack. Then carefully work your way up the wooden platform and kill the blue Bokoblins before they raise the alarm. At the top there is a particularly robust Moblin. Use Stasis+ and headshots instead of risking his heavy blows.
[Optional – be sure to take it with you] There is a Treasure Chest in one of the large ice spikes near a corner. Hold the meteor staff or a firearm next to it until the ice melts. Inside are the last three Ancient Arrows. This means you have a total of nine, provided you have collected the two earlier chests.
Master’s Exam – Level 15
An ice pyromagus, Bokoblins and a black Moblin wait behind a wall of ruins. Climb up one of the towers and immediately kill the ice pyromagus with a fire arrow – fire defeats ice opponents in one hit.
Then attacks the Bokoblins from an elevated position and lures the Moblin out last. Pyromagus ice weapons can freeze strong normal enemies; take his staff with you if there is still inventory space available.
Mastery Exam – Level 16: Ice Talus
The ice talus cannot be climbed safely at first. Melt several ice spikes on the edge to reveal updrafts. A fire arrow or hit with a firearm temporarily thaws the talus and causes it to stagger.
Climb onto his back and now use the Rock Splitter from the rest room for a charged spin attack against the ore deposit. Jump down before the talus freezes again and repeat the process.
Master Exam – Level 17: Blue Lynel
A blue Lynel is waiting here. You can defeat him regularly with headshots, riding attacks and flurry rushes – but for the optimal solution this would be unnecessary risk and would use up numerous weapons.
Activates Stasis+, freezes the Lynels briefly and shoots a Ancient Arrow directly at its body. The enemy disappears immediately. Although you don’t get his normal loot, it would be deleted during the test anyway after completion.
[Optional – Treasure] Melt the ice block in the arena. There is a chest in there five bomb arrows.
Master Exam – Level 18: Final Rest Room
Sneak towards the existing fairies and collect as many as you can. The three chests contain King’s Sword, King’s Shield and King’s Bow. This is your final gear for the Guardian stage.
Catch the three maxi bass from the pond and cook them. A single Maxi Dish will fully heal Link and generate bonus hearts. Cook all remaining healing ingredients sensibly and take your time. From now on there will be no more relaxation rooms.
Master’s Exam – Level 19
Six dilapidated guards stand among the ruins and trees. Wasted here no ancient arrows. Activate the guards one at a time and use trees as privacy screens. A hit to the eye interrupts the laser and allows multiple melee strikes.
If you master perfect parries, you can reflect the lasers with a shield. Position yourself so that only one guard has a clear view of Link at a time.
[Optional – Treasure] A metallic chest lies near one of the guards in the ground or between ruins and contains a Knight’s Shield.
Master Trial – Level 20: Guardian Runner
A single full Guardian Runner patrols the arena. Continue to save the Ancient Arrows if you’re up for a normal fight. Stasis+ stops the machine briefly. Shoot it in the eye and then use melee attacks to cut off the legs. Each destroyed leg stuns the Guardian and provides more ancient materials.
Alternatively, a perfect laser parade works. If your health is already critical and there are enough ancient arrows left, you can of course use one here too – safety comes before theoretically optimal ammunition yield.
Master Exam – Level 21: Guardian Pilot
A sentinel plane is circling over several towers. Climb onto the central structure and open the Paraglider when jumping off. You can shoot at its rotors in slow motion. Bomb arrows destroy the propellers particularly quickly and force the guard to the ground.
The safest way is again to use an ancient arrow on the central body or the eye. With at least eight Ancient Arrows remaining, you can easily afford this luxury.
[Optional – Treasure] On the middle tower there is a chest with five bomb arrows.
Master’s Exam – Level 22
Now a guard runner, a guard flyer and a permanently installed guard tower are waiting at the same time. Run to the central ruins and use the building as a screen. The chests there contain a King’s Bow and King’s Shield.
First eliminate the Guardian Flyer with an Ancient Arrow. Then you switch off the runner in the same way or destroy his legs. You can climb the guard tower from behind and attack it with melee weapons without giving him a clear view of Link. However, if you still have at least two Ancient Arrows, there is no reason why you should remove it immediately.
Master Trial – Level 23: White Lynel and Guardian Tower
The final battle level immediately starts chaotically: eight red Bokoblins ride horses, a white Lynel storms through the arena and a guard tower covers part of the area with its laser. Don’t try to fight this fight “honorably.”
First run behind a large tree or a massive ruin so that the guard tower does not have a clear view. Activate Stasis+ on the Lynels and immediately shoot a Ancient Arrow into its body. The most dangerous opponent disappears within a few seconds.
The red Bokoblins have very little health. Shoot them off their horses, use bombs or take a horse yourself and attack them as they ride past. Once all Bokoblins are dealt with, approach the Guardian Tower behind the ruins, climb up its blind side and destroy it with melee attacks or a final Ancient Arrow.
[Optional – Treasure] On a ruin lies a chest with five bomb arrows. After the last enemy dies, the final teleport field opens.
master’s examination – completion of
Climb the long stairs in the last room. Several Sheikah Priests await Link around the Master Sword’s final pedestal. Pull out the blade a third time. Trial of the Sword has been completely passed.
Master Sword’s base attack power increases from 50 to 60. From now on, the blade is permanently in the state that it previously only achieved when near Ganon, Guardians, Ooze of Hatred or inside Titans. With this you have permanently awakened the true power of the Master Sword.
The fully awakened Master Sword
After all three levels of testing, the Master Sword permanently has 60 attack power and significantly higher effective durability. This makes it ideal for virtually any normal fight. Contrary to what is often claimed, the blade is not completely infinitely usable even after testing. Once its energy is exhausted, the Master Sword will continue to deactivate for approximately ten minutes and then fully recharge.
With its combination of 60 attack power, its own inventory space and automatic regeneration, the fully awakened Master Sword is particularly suitable for exploring large regions. You no longer have to fight weaker opponents with high-quality disposable weapons and can save strong royal, elemental or warrior weapons for special situations.
The test of the sword is now completely completed. For more content from The Legendary Trials – including Travel Medallion, Korok Mask, Phantom Armor and Master Mode – check out our overview of DLC content. The original ZeldaCollection special page for Examination of the Sword can also refer to this optional section as its own introduction.
Checking the sword in master mode
[Optional – Master Mode] In Master Mode, the structure of all rooms remains the same, but most normal enemies appear one step stronger and regenerate their lost health after a short time without being hit. This changes the optimal way of playing significantly: Long bomb tactics work worse against stronger opponents because their regeneration compensates for the slow damage. A 30-minute attack bonus level 3 is therefore particularly recommended in master mode.
The most notorious section is beginner’s exam level 10. The silver echsalfos there have enormous health and regenerate quickly. Kill the weak enemy on the pier immediately without alerting the others. Then approach a single Silver Lizard in a crouch, use a sneak strike and position yourself again for further ambushes. Stasis+ and Electric attacks prevent the enemy from fleeing or remaining unmolested long enough to recover large portions of their health.
The same applies in all other rooms: Completely defeat opponents before moving on to the next one. Headshots, Flurry Rushes, Sneakstrikes and elemental instant KOs become significantly more important in Master Mode. The Locations of the weapons and ancient arrows remain identical, which is why the room solutions in this chapter generally continue to work.
Keywords: Trial of the Sword, Breath Wild Solution, Master Sword, DLC 1, Beginner Trial, Advanced Trial, Master Trial, Ancient Arrows, Master Mode, Forest Koroks, Sword Trial, Master Sword, DLC Solution, Sword DLC, Ancient Arrow