

Vah Naboris is freed, Urbosa’s wrath is part of Link’s combat skills, and all four Titans aim their guns at Hyrule Castle. In order to keep the score as complete as possible, we still don’t leave the Gerudo Desert. By defeating Thunderblight Ganon, two new Side Quests have become available in Gerudo Town, which, together with “Noble Stones” and “The Molduga Heart”, clear the way to the Thunder Helmet. At the same time, the objectives of these tasks are so convenient that we can complete the southwestern edge of the desert with the Great Fairy Tera, the Hawa Koth Shrine, a Korok and another important photo in a single round.
After that the only thing missing is the sand seal race south of Gerudo Town. There we unlock another shrine with Raqa Zunzo. This order avoids several unnecessary trips across the Gerudo Desert and at the same time gives us two valuable pieces of equipment: the Thunder Helm with full lightning protection and the Raqa Zunzo Sunshield.
The Treasure of the Gerudo start
After completing Vah Naboris, return to Riju’s throne room if you are not already standing there. Next to Riju is the Thunder Helmet again. Examine it and tell the Gerudo Queen that you would like to use the helmet. Riju is generally willing to lend you the heirloom, but first demands that Link take care of the problems of her subjects.
This begins the Side Quest “The Treasure of the Gerudo”. Four other Side Quests must be completed: “Noble Stones”, “The Molduga Heart”, “The Environmental Polluter” and “The Search for Barta”.
We have already completed “Precious Stones” before Vah Naboris and reopened Isha’s jewelry shop. We have also already accepted “The Molduga Heart” at Malena. The Molduga itself and the two tasks that only become available after Vah Naboris remain open. You can also find a detailed individual overview in the existing ZeldaCollection guide for the thunder helmet.
The Mystery Polluter – Dalia and Calyban
Optional – Side Quest: Go to the northern corner of Gerudo Town during the day. There the Gerudo girl Dalia stands sadly at a small bed. She wants to grow plants there, but the water is constantly polluted with waste. Speak to her and start “The environmental sinner”.
Then follow the watercourse to the west against its flow direction. Climb onto the roofs or the raised ledge behind the buildings. Calyban sits there and eats one frostmelon after the other. She throws the remaining bowls into the water canal, causing Dalia’s problem.
Calyban agrees to quit if you bring her 10 wild berries. If you followed our route via the Rito village and the Hebra region, there is a good chance that there are already enough wild berries in your material inventory. Check inventory before teleporting anywhere.
If you have ten pieces, hand them in directly. Calyban promises not to throw the frostmelon remains into the waterway in the future. Then return to Dalia. The water is clean and the bed can finally be used. As a small reward you will receive a frost melon. Later, wild berries will grow in the bed, which you can harvest for free.
If you’re still missing wild berries, we won’t force you to make a big detour. A particularly large number grow in the cold areas of Hebra and the Gerudo Plateau. Since we will be visiting the latter in detail for the eighth warrior anyway, you can take the missing fruits there and then complete the task. For our optimal score, there should normally be enough after the Rito route has already been completed.
Start the search for Barta
Optional – Side Quest: Then go to the training ground in the western part of the city and talk to Liana. Barta has disappeared again. After her trip to the Yiga hideout, she wanted to examine the huge fossil in the very southwest of the desert and didn’t return.
This starts “The Search for Barta”. Before you leave, be sure to buy a Maxi Durian from the Gerudo Town market if there is none in your inventory. Barta cannot be persuaded to return without this fruit.
For the following tour you will also need heat protection level 2 if you are out and about during the day. The complete women’s set only protects against normal desert heat and is not sufficient everywhere in the extremely hot southwest. The most convenient is the desert set from the Gerudo Secret Club; just two parts provide enough heat protection. Alternatively, combine clothing with cooling medicine or a corresponding dish.
It gets very cold again at night. Our Rito clothing solves this problem easily. If you want to avoid the temperature change completely, start in the morning and take both heat protection and your Rito equipment with you.
With the sand seal to the exile of the dragons
Hire a sand seal in front of Gerudo Town or catch a wild one outside the walls. Our first target is not the Gerudo Giant Fossil directly, but the area north of the Exile of the Dragons. One of the four Molduga of the Gerudo Desert lives there and it is almost exactly on our route to Barta.
Travel southwest from Gerudo Town. As long as the map and minimap are working, you can use the extreme southwestern edge of the map as a good guide. Later you get caught in a sandstorm and the Sheikah Slate temporarily fails. If possible, stay in the same direction and only correct when you can see prominent rocks or the huge skeleton.
Optional: Korok north of the Dragon Exile
Optional – Korok: Before we attack the Molduga, north of the dragons’ exile, pay attention to three cacti growing in a row. There are trembling fruits hanging on all of them, although one of the cacti has more fruits than the other two.
The goal is to make all three plants look identical. Therefore, only shoot the excess trembling fruit from the fuller cactus. As soon as the number and position of the fruits on all three plants match, the Korok appears. Then calmly collect the fallen trembling fruit again.
Defeat Medicinal Molduga – Molduga
In the sandy area near larger rocky islands, the music of a mini-boss suddenly begins and a large movement appears under the sand. This is our Molduga for Malena’s task. A detailed overview of all four Locations can be found in the ZeldaCollection guide to the Molduga.
First jump off the sand seal and climb onto one of the rocks. Molduga react to vibrations in the sand. Link is therefore largely safe on solid rock. Throw a round remote bomb a short distance onto the sand and wait.
The Molduga registers the movement and swims underground towards the bomb. As soon as he is directly below or jumps out of the sand, you detonate the bomb. The explosion hits him from below and throws the huge monster out of the sand. Now your damage phase begins.
Jump down and strike with a strong two-handed weapon, the Master Sword or another good melee weapon. Thanks to the Urbosa’s Fury you just received, the fight is now particularly easy: Hold down the attack button while stunned for a charged attack and trigger Urbosa’s lightning. As a result, the Molduga loses a lot of energy and is additionally paralyzed.
Pull back onto a rock in time before he catches himself. Repeat the bombing tactic. Avoid walking across open sand for long periods of time, as the Molduga can appear directly under Link and throw him high into the air.
After his death he leaves behind several Molduga fins and Molduga hearts. We only need one heart for Malena, but we should definitely keep the other materials. They will be needed later for upgrading sand boots and other equipment.
Also opens the Treasure Chests, which can emerge from the sand after the fight or lie in the immediate area. Due to world progress, their specific weapon contents may differ.
To the Gerudo giant fossil
Continues southwest. Soon the visibility almost completely disappears in the sandstorm. A sand seal is particularly useful here because it keeps its direction even when the map and minimap fail.
The target is hard to miss once you’re close enough: massive bones protrude from the sand, forming the Gerudo Giant Fossil. Under its ribs lie three important destinations on our route: Barta, the Hawa Koth Shrine and the source of the Great Fairy Tera.
Optional: Photo for “Colossal Bones”
Optional – Side Quest: If you have already accepted the Side Quest “Colossal Bones” at the Maritta stable, take out the Camera Rune immediately. Stand in front of the fossil so that the large skull is clearly visible in the image and wait for the motif to be marked in red.
For the task, the colossal whales in Eldin, Hebra and Gerudo must be photographed. Since we are currently at the most remote of the three Locations, it would be unnecessary to drive back here later. If you haven’t accepted the task yet, you can still remember the location; For our later 100% section, we’ll connect the three fossils to other open targets.
Save Barta with a maxi durian
Go under the Gerudo giant fossil and search the massive skull. Barta collapsed there, completely exhausted. She just mumbles that she would like to eat a maxi durian one last time.
Speak to her again and give her the prepared Maxi-Durian. Barta suddenly regains her strength. As soon as Link mentions that Liana is pretty angry, she makes her way back to Gerudo Town surprisingly quickly.
The task is not yet completely completed. We have to report to Liana later, but we’re not teleporting back yet. There is too much important content right next to us.
Optional: Korok on the Gerudo giant fossil
Optional – Korok: Now climb onto the bones of the giant fossil. Our target is one of the highest jutting bones directly above Tera’s Fairy Spring.
With Revali’s Gale you save most of the climb. Slide onto the back or upper ribs of the skeleton and work your way to the tip of the corresponding bone. Small leaves or fairy lights sparkle there. Examine them and you will receive another Korok Seed.
Since this seed is at the very edge of the world map, going back later on your own would be particularly annoying. That’s why it’s a must on our current route.
Great Fairy Unlock Tera
Optional – Great Fairy: Beneath the ribs of the Gerudo giant fossil is a huge closed flower bud. Approach and speak to the voice within. This is where Tera lives, one of the four Great Fairies of Hyrule.
How many Rupees Tera requires does not depend on its location, but rather on how many Great Fairies you have already unlocked. The first costs 100 Rupees, the second 500, the third 1,000 and the fourth 10,000 Rupees. If Tera is the last fairy missing from your score, the highest amount will be due.
For a 100% score, all four fairy springs should be opened sooner or later, because only then can strengthenable armor pieces be improved up to level 4. If you have the necessary Rupees, Tera pays immediately. You can find more Locations and all the materials you need for armor upgrades in the ZeldaCollection guide to the Great Fairies.
If you are missing 10,000 Rupees, don’t sell rare upgrade materials without thinking. Gemstones like amber and opal are easier to recover than diamonds or star shards. With the two gold Rupees in the Yiga hideout, the gemstone quest in Goron City and the previous shrine chests, there should already be a good foundation.
Valuable plants such as princess gentian and fit carrots also grow around Tera’s spring. Collect them with you. Once the spring is opened, small fairies may also appear in the area. Approach crouched and catch them carefully; a fairy automatically revives Link when his hearts fall to zero.
Hawa Koth Shrine – High Voltage
Optional – Shrine: Directly below the skull of the giant fossil lies the Hawa Koth Shrine. Because it also offers a perfect teleport point to the fairy spring, we solve it completely. The shrine is one of the shrines at the Wasteland Tower.
In the first room there is an electrical energy source on the left and an unpowered switch on the opposite side. There are two metal blocks in between. Uses the magnetic module and forms a conductive connection between source and receiver. As soon as the electricity jumps, the grid opens.
In the next section you will see a metal chest in the water on the right. Immediately pull it out with the magnetic module. Inside lies a Ancient Core. This treasure is one of the more valuable shrine rewards and should not be overlooked.
Next to it, an electrically charged metal ball hangs on a chain wrapped around a post. Grab the ball with the magnetic module and guide it around the post until the chain is free again. Then drag the ball to the orange contact. The electricity activates a ramp or platform and opens the way forward.
There are three Nano Guardians in the next area. Kill them with your bow or a fast melee weapon before dealing with the energy sphere. Lift the ball with the magnetic module and carry it over the ramp. Keep it as high as possible above the ground so that it doesn’t accidentally touch the side contacts.
Look up the right wall. There is another contact with a small shelf. Place the energy ball there. A platform extends and gives you access to a Treasure Chest. Inside is a Golden Rupee worth 300 Rupees. Especially if Tera previously asked for 10,000 Rupees, this reward comes in handy.
Then retrieves the ball and brings it to the end of the area. Place it on the round power contact. This causes one of the large gears in the next room to start moving. However, a third gear is still missing.
Hawa Koth Shrine: the final electricity puzzle
Go right to the big block puzzle. There are several stone blocks and movable metal blocks in front of you. A Floor Switch changes the inclination of the system and allows the moving stones to slide to the other side.
Before you enter the switch, use Stasis to freeze the middle stone block in the row or column closest to you. Then step on the Floor Switch. The remaining blocks slide to the other side while the frozen block maintains its position.
Stand on the switch and use the magnetic module to move the two metal blocks on the left side. Position them so that they close the gaps in the electrical wiring after the stone blocks are reset. Then leave the Floor Switch. The stones slide back again and together with the metal blocks a continuous circuit is created.
The grate at the missing gear opens. Before you take out the gear, look behind it. There is a Treasure Chest with a sapphire. Then pull the large metal gear with the magnetic module out of its holder and carry it back into the main room.
Places the gear between the two existing gears. The mechanics interlock, the last gate opens and you can reach the priest Hawa Koth. You will receive another Spirit Orb.
The shrine is now also our permanent fast travel point for Tera and the far southwest Hyrule’s.
Back to Gerudo Town
Now teleport to the Daqo Chisay Shrine in front of Gerudo Town and put on the full women’s set again. Within the city we complete the open Thunderhelm tasks.
First go to the training ground to Liana. Barta has since returned. Report to Liana about her rescue and you will receive a Silver Rupee worth 100 Rupees. “The Search for Barta” is now complete.
Then look for Malena and give her one of the Molduga hearts captured from Molduga. She can finally produce the medicine for her sick husband and rewards Link with 300 Rupees. This also ends “The Molduga Heart”.
If you have already completed “The Polluter” before the desert tour with Dalia and “Noble Stones” was completed earlier as intended, all four requirements for the Thunder Helmet are now met.
Obtain Thunder Helm
Return to Riju in the palace and talk to her about the Thunder Helmet again. Link has taken care of all issues relevant to the Gerudo treasure. Riju keeps her promise and gives you the Thunder Helmet.
The helmet only has three points of basic defense and can be used with the Great Fairies cannot be improved. Its effect is exceptional: Link suffers no damage from lightning strikes. The Thunder Helm even protects against Vah Naboris’ special lightning bolts.
This makes it one of the most useful pieces of equipment in the game during thunderstorms. You no longer have to frantically discard metal weapons, bows and shields as soon as the lightning gauge builds up around Link. This also makes electrical opponents much less dangerous, although normal electrical contact damage is not the same as every lightning strike.
Optional – Hyrule Manual: Armor pieces do not have normal manual entries. A photo of the Thunder Helm is therefore not necessary to complete the Hyrule Compendium.
Obtaining the helmet completes “The Treasure of the Gerudo”.
The Undefeated Champ – Sand Seal Race
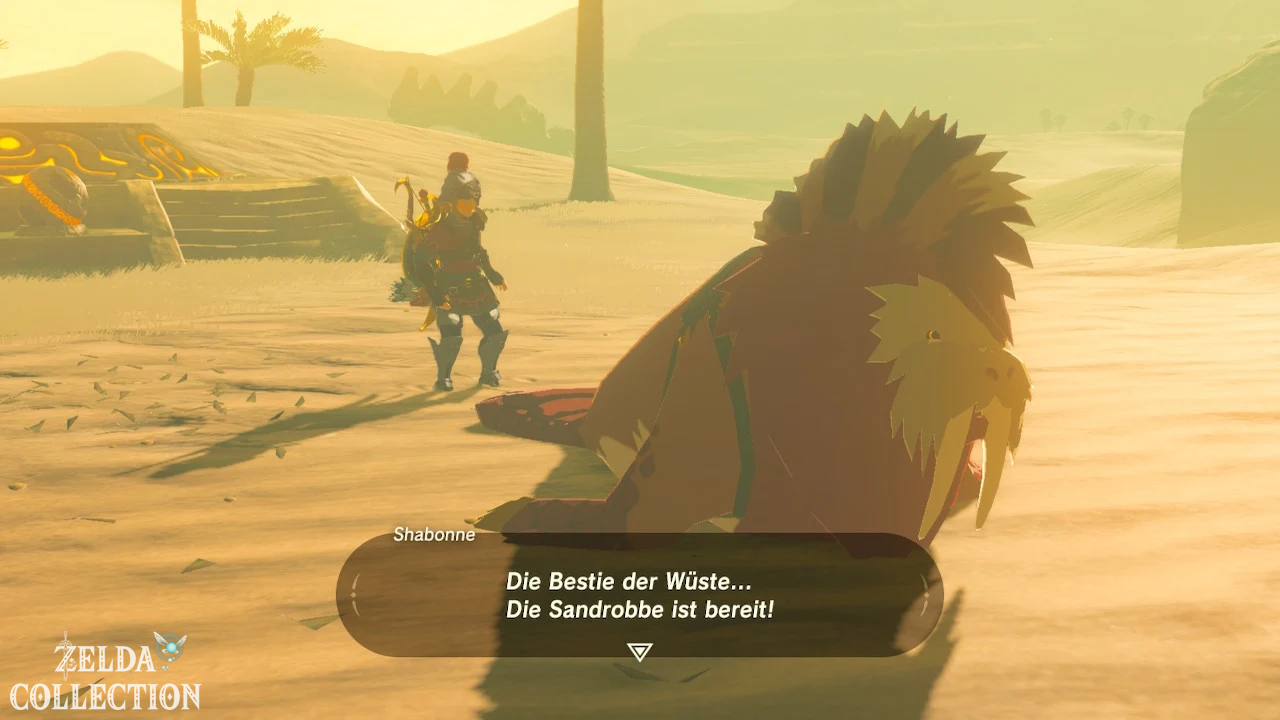
Optional – Shrine Quest: Freeing Vah Naboris has unlocked additional content. Leave Gerudo Town and travel to the Sand Seal Racetrack, southeast of the city of. The Gerudo Tali and her companion are waiting there at a large pedestal with a glowing ball.
Tali is considered an undefeated champion. Her record is 1 minute and 30 seconds. Speak to the Gerudo and accept the challenge. This starts the shrine task “The Champion”.
When running, Link is automatically pulled by a sand seal. You have to go through in total seven goals drive and then reach the finish line. If you miss a goal, the run doesn’t count.
The most important rule is: Steer as little as possible. Sand seals lose significantly more time through hard changes of direction and collisions than through small detours. After one goal, align yourself with the next one and correct with gentle movements of the left stick.
Periodically press the acceleration button as the seal slows down. Pay particular attention to rocks and cacti. A collision can quickly take several seconds and is much more difficult to compensate for than a slightly wider curve.
Some goals are not exactly in a straight line. Don’t cut the curves too closely, because Link actually has to drive between the two markings. Especially on the last third of the course, it is better to let the seal run stable than to hit a post with hectic corrections.
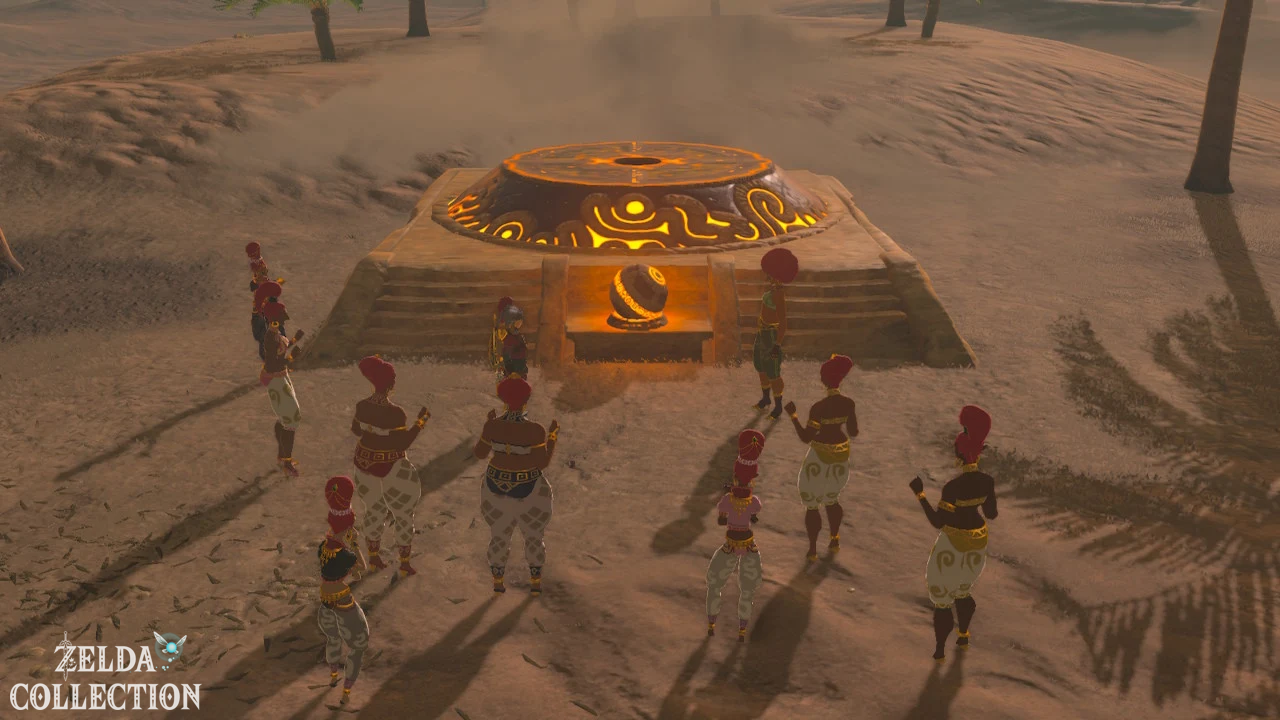
If you beat Tali’s time of 1:30, you will receive the large glowing ball as a trophy.
Unlock Raqa Zunzo Shrine
Carry the ball to the shrine base immediately next to the race track and place it in the recess. The floor opens and the Raqa Zunzo Shrine rides up. This concludes The Champion.
The actual shrine is a blessing and contains no other puzzle. Just run forward and open the Treasure Chest. Inside is a sun shield. With its high shield strength and the design typical of Gerudo equipment, it is a very useful shield.
Optional – Hyrule Compendium: Photograph the Sunshield before picking it up if its entry is still missing.
Then go to the priest and take the next Spirit Orb.
After the first victory, the sand seal race becomes permanently available as a mini-game. For our walkthrough, the first successful round is particularly important because it is the only one that unlocks the shrine. Additional races can be played for better times and additional rewards, but are not necessary for the actual 100% card score.
What remains open in the Gerudo Desert
Although we have completed the main Gerudo story and the Thunder Helm, the region is far from complete. Among other things, the eighth warrior and the forgotten sword in the Gerudo plateau, the seven warriors, Dako Tah in the sandstorm, Tho Kayu at the Torma dunes, Misae Suma and his drink, the southern labyrinth, other Molduga and numerous Koroks are deliberately left open.
However, these targets lie in several distinct area clusters. Approaching them individually from Gerudo Town would create exactly the large collection rounds that we want to avoid with this Walkthrough. Instead, we will later connect it to the full route through Gerudo Plateau, Desert Castle Ruins, Torma Dunes and South Gerudo.
The eighth warrior in particular will be bundled with several shrines, the snow boots, the Gerudo peak and other collectibles. The southern labyrinth also gets its own meaningful section, rather than just being traversed for a single chest.
For the main path we have reached an important milestone at this point: All four Titans are freed, all four warrior abilities are available, the Master Sword is in Link’s possession and the Thunder Helmet is permanently part of our equipment. This means we can now devote ourselves again to the major supra-regional goals Hyrule’s and at the same time systematically complete the regions that are still open.