

We crossed the Hyrule Mountains very early on on the way to the Rito village. At that time our route led through Deathbringer Gorge, past the Zalta Wa Shrine and then continued north. This was enough for the main story, but for a 100% playthrough almost the entire region remained open. Now we get the Ridgeland Tower, solve the tests on the Thunder and Washa’s Bluff, explore the Satori Mountain, find the Great Fairy Kaysa, complete our DLC horse equipment with the Ancient Bridle and collect all 80 Koroks from the Tower region. In addition, we take three regional Hinox enemies and a glowstone Stone Talus for Kilton’s later monster orders.
A total of seven regular shrines belong to the Ridgeland Tower: Zalta Wa, Toh Yahsa, Maag No’rah, Shae Loya, Mijah Rokee, Mogg Latan and Sheem Dagoze. The additional Shira Gomar Shrine is part of Revali’s Ballade and has already been completed in the DLC chapter. The existing ZeldaCollection overview can be found at Ridgeland Tower – Shrines; For our new 100% playthrough, we’re correcting several old chest details and connecting the seven normal shrines to all remaining objectives in the region.
| Shrine | exam | Important Treasures |
|---|---|---|
| Zalta Wa | Following the bullets | Knight’s Bow |
| Toh Yahsa | The Secret of the Cracks | Insulating Armor, Opal |
| Maag No’rah | Maag No’rah’s blessing | Silver Rupee |
| Shae Loya | The right moment | topaz, swallow/falcon bow |
| Mijah Rokee | A Modest Test of Strength | Ice Sword |
| Mogg Latan | With momentum | Forest Lance, Forest Bow, Golden Rupee |
| Sheem Dagoze | lateral thinker | Electric Greatsword |
Preparation for Hyrule Mountains
The region does not require any special armor, but some equipment makes the tour much easier. There are constant thunderstorms on the Thunder Plateau, which is why we use either the Thunder Helmet or non-metallic equipment there. Revalis Sturm+ saves a lot of climbing work on the large mushroom rocks, on Satori Mountain and around the tower. The teleport medallion that we just collected on Lomei Labyrinth Island is also ideal for the blood moon test on the Washa’s Bluff: we use it to mark the shrine base and don’t have to wait for hours on site for the next blood moon.
Expansion Pass owners will also finally complete “EX: Antiques for the Horse” in this chapter. We have already found the Ancient Saddle at Malanya’s Source; The Ancient Bridle lies under the cherry tree on Satori Mountain. Together they form the only horse equipment with real gameplay bonuses. If you want to improve all your armor, you should also pay attention to rare plants, beetles and animals – Satori Mountain in particular is one of the areas with the most resources Hyrule’s.
Zalta Wa Shrine in Deathbringer Gorge
Teleport to the Central Tower and from there move northwest across the Carok Bridge towards Deathbringer Gorge. We already took this exact route during our early march to the Rito. If you were just using Zalta Wa Shrine as a landmark back then, we’re now closing it completely. If it is already blue on the map, you can jump directly to the next section.
Zalta Wa Shrine – Chasing the Bullets
Directly in the first room you will see a ball on a small pillar on the left, a Floor Switch on the right and a Crystal Switch in the middle. Shoot the ball with an arrow so that it falls from its column into the hollow next to it. This opens the first chamber and releases a second ball. Axyl this up and stand with it on the Floor Switch. The door next to it opens. From there, throw the ball into the recess behind the door before leaving the switch again.
With this, the large space above the central platform begins to move back and forth. Stand in front of the Crystal Switch and hit it the moment the moving space moves towards you. The platform catapults Link upwards. If necessary, briefly open the Paraglider and land in the movable area. Before you go to the priest, climb further up and slide to the raised platform above the floor switch area. There is the only Treasure Chest with a knight’s bow. The older ZeldaCollection table still mentions a scale lance here; We do not accept this information.
Return to the upper level, follow the ramps to Zalta Wa and collect the Spirit Orb.
Activate Tower of Hills
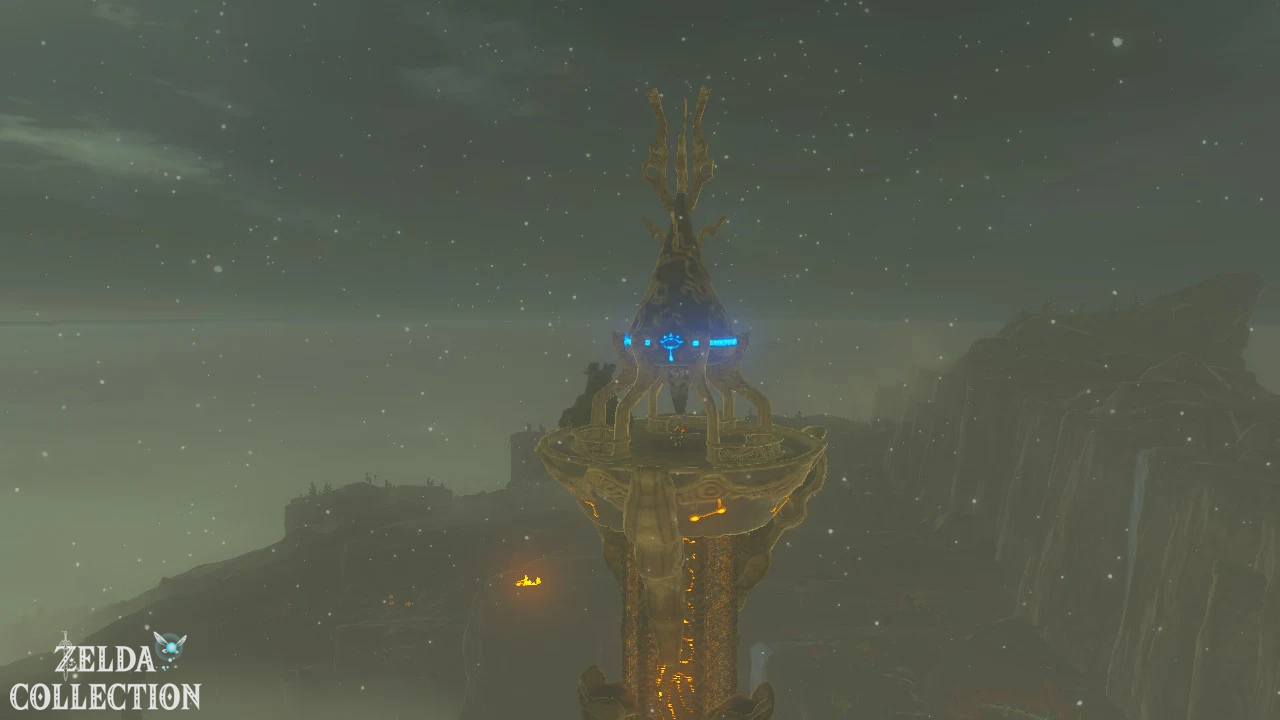
From Zalta Wa Shrine, head west to Ridgeland Tower. The tower stands in the middle of a wide lake. Lizalfos and several electric pyromagi are lurking all around, whose attacks can be particularly dangerous for Link in the water. Based on our progress in the game so far, we no longer take the arduous route via Cryonis platforms: stand on solid ground on the bank, create an updraft with Revalis Sturm+ and glide directly to the highest possible platform on the tower. From there the rest of the climb is easy.
Activates the terminal above. This reveals the full map of the Hyrule Mountains – including Thunder Plateau, Seres Plains, Satori Mountain, Rutile Lake, Rhoam Mountain, Washa’s Bluff and parts of Kukudja Gorge. There are also two Treasure Chests in the lake under the tower: north of the tower a wooden chest with five fire arrows and at the southwest edge of the water a chest with a purple Rupee.
Optional: Birdfolk Challenge
The researcher Branli stands on the top of the tower. Talk to him after the tower is activated. For 20 Rupees you can take part in his Bird Folk Challenge. The aim is to cover as much distance as possible with the Paraglider from the tower. The reward increases with the flight distance. Revalis Sturm can be used during the attempt and is ideal for ascending again after the first loss of altitude. The mini-game is not necessary for card scoring; for our complete tour we complete at least one attempt.
Trial of Thunder – Thunder Plateau
The Thundra Plateau is immediately northwest of the tower. As soon as Link approaches the walled enclosure, the shrine task “Trial in the Storm” automatically begins. A heavy thunderstorm hangs permanently over the plateau. With the Thunder Helmet you can virtually ignore the threat of lightning; Without it, you discard metallic weapons, bows and shields as soon as the lightning symbol in your inventory or next to Link starts flashing.
There are four large pillars in the center. Each has a colored symbol and there is a hollow in front of each pillar. Four balls with the same colors or symbols are distributed on and around the plateau. Some are inside the complex, others outside or on raised pillars. First, get the outer balls down. Balls that land outside the high surrounding wall can be catapulted over the wall with stasis and several hits. Be careful not to hit them so hard that they fly out the other side.
Then assign each ball to the appropriate column based on its symbol and place it in the hollow in front of it. Once the fourth orb is properly deployed, the persistent storm over the plateau disappears and the Toh Yahsa Shrine rises in the center. This concludes “Trial in the Storm”.
Toh Yahsa Shrine – Secret of the Rifts
In the shrine, large parts of the room are covered by brittle stone blocks. Blow them up with remote bombs. A metal cube, a large Floor Switch and several passages appear under the blocks. Be sure to check the area directly below the entrance: There is an easily overlooked niche with a Treasure Chest. Inside lies the insulating armor.
After the Rubber Helm from the stable at the lake and the insulating pants from the Qukah Nata shrine, we now have the complete insulating set. After sufficient improvements to the Great Fairies, the complete Link set protects particularly effectively against electricity. A second Treasure Chest with a Opal stands on a pillar. Use the exposed metal cube and the magnet module to push them down and reach them respectively. Then place the cube on the large Floor Switch. The path to Toh Yahsa opens and you receive the Spirit Orb.
Seres Plain – Blue Hinox
To the west and southwest of the Thundra Plateau lies the Seres Plain. Fall asleep between the large mushroom-shaped rock formations blue Hinox. This copy counts separately for Kilton’s Order of Hinox and is therefore dealt with now. An arrow in the eye brings down the giant; Then you use the strongest melee weapon and, if necessary, Urbosa’s Fury+. If the Hinox later covers its eye with its hand, it waits for an attack and fires again as it moves.
Then take the Koroks between the mushroom rocks. Several of them hang as balloons under the rock overhangs, one starts with a tree stump on top of one of the large mushrooms. These Locations are easy to miss because the Sheikah sensor hardly helps with orientation between the high rock formations.
Luminous Stone Stone Talus on Tilio Slope
Moves further north or northwest to the Tilio slope. On the flat northern plain, a Glowstone Stone Talus disguises itself as an ordinary pile of rocks. For Kilton’s Stone Talus Order, this individual specimen must also be defeated at least once. Wake up the opponent, use Revali’s Gale+ or climb over his arms onto his back and hit the glowing ore boulder. Heavy weapons such as mountain splitters, rock splitters and iron hammers cause particularly high damage.
Around the Stone Talus there are three Koroks practically directly on our route: a stone to the west of the enemy, a fragile rock wall to the east of it and a magnetic block puzzle further northwest on the edge of the Kukudja Gorge.
Maag No’rah Shrine on Tilio Mountain
To the east of the Tilio slope rises the Tilio mountain. The Sheikah sensor works here, although there is no shrine in sight. Look for a noticeable collection of brittle rocks on the north side of the mountain relatively far down. Blow them up with a remote bomb. Behind it opens a small cave with the Maag No’rah shrine.
Maag No’rah Shrine – Maag No’rah’s Blessing
The search for the hidden entrance was the real test. Inside there is only a Treasure Chest. Open it and take the Silver Rupee worth 100 Rupees. You then pick up the Spirit Orb.
Rhoam Mountain and Marathon
From Tilio Mountain we move west to Rhoam Mountain. Climb to the top and lift the small stone there for a Korok. North of the mountain you will find a small pond; There is also a Korok stone at the top of his waterfall. A little further north is the marathon registration from the Hylian Konba.
Optional: Marathon against Konba
For 20 Rupees you can compete against Konba. The goal is the flag on or at Rhoam Mountain. Stamina-enhancing dishes and the climbing set are permitted. Even though this mini-game doesn’t unlock any unique gear, we do one run for the full regional route. The location “Marathon registration” itself should also be discovered on the map.
Tabanta Bridge Stable and Shae Loya Shrine
Follow Rhoam Mountain southwest to Tabanta Bridge Stable. This stable was already on our early route to the Rito area, but was not completely worked through at the time. Directly above the stable is the Shae Loya Shrine. Activate it first.
Shae Loya Shrine – The Right Moment
In the first room, a ball is thrown vertically upwards at regular intervals. Freeze it at its highest point with Stasis and shoot some arrows at it. As time continues, the ball is pushed out of its previous path and falls into the designated recess. This causes the floor plate at the entrance to begin catapulting Link upwards.
Let yourself be thrown up and first slide towards the ball mechanism. There is a Treasure Chest with a Topaz. A second chest is on a wooden platform on the right wall. Shoot through the ropes and open them. Depending on your game progress, it contains a swallow bow or falcon bow; In our advanced state of the game, the stronger variant should probably be. Then return to the catapult plate. Let yourself be shot up again and look at the left wall while flying. Hit the Crystal Switch with an arrow. The gate to Shae Loya opens.
A Gift for the Great Fairy – Great Fairy Kaysa
Speak to gates at the stable. He dreams of finding a Great Fairy and has heard that the shadow of Tabanta Tower points to its source in the afternoon. Since he can’t get up himself, he gives Link his entire savings of 500 Rupees. This begins “Follow the Shadow”.
Kaysa’s source is located on Piper Ridge west or southwest of the Tabanta Bridge. If you follow our previous route completely, Kaysa should be the last Great Fairy that has not yet been explicitly activated. In this case, she demands not only Toren’s 500 Rupees, but the fourth fairy’s cost: 10,000 Rupees. The prizes depend on the order in which the four fairies are awakened – 100, 500, 1,000 and 10,000 Rupees – and not on a specific fairy. Toren’s money is then just a subsidy.
Pays the requested amount. With Kaysa, all four Great Fairies are now available and all upgradeable pieces of armor can be brought to their maximum level, provided the required materials are available. Then talk to Gates at the stable again to complete Follow the Shadow. He does not pay any additional reward. You can also find all four sources in our guide to the Great Fairies.
Commemorative photo – Zelda’s Zorn
Just a little west of the stable are the ancient stone columns. This is the location of the fifth photo in the Sheikah Album. Look for the golden glow among the ruins and examine it. Link remembers “Zelda’s Wrath”: Zelda tries in vain to gain access to a shrine and reacts angrily when Link appears.
If you have also visited all of the other photo locations on our route so far, the main task “Souvenir Photos” should now be nearing completion or already complete. You can find the overall overview in our guide to the memories.
Kukudja Gorge – Rumpelgolf
Below the Tabanta Bridge lies the Kukudja Gorge Square. Slide down from the stable and talk to the Goron Modar. For 20 Rupees the mini-game Rumpelgolf starts. A large stone ball must be pushed into the hole at the other end of the course with as few hits as possible. Use an iron hammer or other heavy weapon and do not hit with full force if the ball is close to the edge of the ravine. Stasis can help with assessment and targeting, but is not necessary for the actual striking.
Play at least one round and don’t forget the Korok at the finish: There is a small sparkle on the flag. This location is also one of the easily overlooked map names of the Hyrule Mountains.
Satori Mountain – one of the most productive areas Hyrule’s
Teleport back to Shae Loya Shrine and then move southeast to Satori Mountain. The mountain is particularly valuable for our 100% score. An unusually large number of rare plants and mushrooms grow here, animals gather in several places, and numerous Korok puzzles lie close together around Rutile Lake. At the top there is a large cherry tree next to a small pond.
Optional (DLC): Antique Bridle
Activates the magnetic module under the cherry tree. There is a Treasure Chest labeled “EX” in the bottom. Pull it out and open it. Inside lies the antique bridle. It increases the number of gallop spurs in a suitable horse. Since we have already found the Ancient Saddle at Malanya’s Source, “EX: Antiques for the Horse” is now complete. The saddle allows you to summon the horse from a long distance, and the bridle improves its endurance. We cover more horse equipment in our guide to horses and antique horse equipment.
Optional: Lord of the Wild
The Lord of the Wild does not appear on a fixed schedule that can be controlled by the player. When the summit area of Satori Mountain glows intense green from the distance, it is at the small pond under the cherry tree. Then teleport yourself to the Mogg Latan Shrine as quickly as possible or travel to the summit. Use the Sheikah Set or Stealth Food to sneak up on the creature from behind and jump onto its back. Taming requires a lot of stamina; Endura dishes make the attempt much easier.
After calming down, the Lord of the Wild can be ridden like an extremely fast horse. It has practically unlimited gallop spurs, but can not registered at a stable become. As soon as Link descends for a longer period of time or leaves the area, he disappears again. This encounter is not required for card scoring, but it is still one of Breath of the Wild’s unique events for a complete playthrough.
Stalnox south of peak
South of the Mogg Latan Shrine or in the forests of Satori Mountain there is a large pile of bones during the day. Come back at night to awaken a Stalnox. Defeat him now for Kilton’s Order of Hinox. As always, hit the eye with an arrow, attack while stunned, and towards the end destroy the eye that falls out completely before it returns to the body.
Mogg Latan Shrine – With momentum
Mogg Latan Shrine is located on the south side of Satty Peak. In the first area, several platforms hang on ropes. Use the magnetic module or your own weight to make it oscillate and jump at the right moment. With a drawbridge you have to cut the ropes as soon as the structure is in a good position. The first Treasure Chest with a forest lance is located right there.
In the following section, large spiked balls swing across the path. Grab it with the magnetic module and pull it as far to the side as possible before letting go. As they swing back, you sprint past. In this area you reach the second Treasure Chest with a forest arch.
Later you have to stack several metal blocks to form a staircase. Before climbing, check the underside or the room under this construction: There is a third chest with a Golden Rupee worth 300 Rupees. In the end, dry tendrils block the large double door. Burn them with a fire arrow or use the lanterns available. The path to Mogg Latan is then clear.
Rutile Lake and Koroks at Satori Mountain
Before we move on, let’s clear out the entire Satori Mountain and Rutile Lake. There is a Korok stone directly on the cherry tree. At the Mogg Latan Shrine there is another hidden under a pile of leaves. A sequence of flowers begins between the three parts of the summit, a time trial starts to the south, a wind turbine awaits on the north edge and in the east there are acorns, a hollow tree stump and other sparkling puzzles.
There are several seeds that are particularly easy to miss at Rutile Lake: There is a stone circle in the water, northeast of which is a chained metal ball that must be brought into the appropriate opening using the magnetic module. A succession of flowers awaits in the northern forest. Check this area extra thoroughly before we leave the mountain.
Under a Red Moon – Kass on the Washa’s Bluff
To the northwest or west of Satori Mountain lies the Washa’s Bluff. Kass stands on one of the characteristic mushroom-shaped rock platforms. Talk to him and listen to his song. This begins the shrine task “The Night of the Blood Moon”. Below Kass lies an ancient platform that glows orange.
The solution is simple, but the timing cannot be planned: On a blood moon night, Link has to stand on the platform completely without armor, weapon, bow and shield. A blood moon cannot be reliably forced by repeatedly waiting around a campfire. This is exactly where we use our teleport medallion. Place the teleport point directly next to or on the platform and then continue the normal regional route.
As soon as the sky turns red later in the evening and the typical blood moon music starts, you immediately teleport to the Washa’s Bluff. Remove all weapons, bows, shields and pieces of armor and stand on the pedestal before midnight. It lights up blue and the Mijah Rokee Shrine rises from the ground. This works even if the Blood Moon is announced during a completely different chapter – so remember the teleport point if the event doesn’t take place today.
Mijah Rokee Shrine – Trial of Strength (Medium)
A Guardian Scout III is waiting in the shrine. The middle test of strength should hardly cause any problems for our now very well-equipped Link. Use perfect evasion, Urbosa’s Fury+ or strong guardian or ancient weapons. During the rotating attack you hide behind one of the pillars. After the victory, the path to the priest opens. There is a ice sword in the chest.
Western Hyrule Field – second blue Hinox
From Washa we move southeast to the Western Hyrule Plains. Another blue Hinox sleeps here, which we also have to defeat at least once for Kilton’s order. After the numerous Hinox fights so far, the familiar tactic of headshots and strong series of close combat is sufficient. Then check the trees and the northern rocky areas of the level: There are several Koroks in the immediate vicinity of the next shrine task.
The Two Rings – Sheem Dagoze Shrine
In the south of the Western Hyrule Plain you will meet Kass again. Around it are eleven striking rocks with circular openings. His song describes the solution: A single arrow must fly through two stone rings. A multiple sheet is not an abbreviation; What is crucial is that the same arrow passes through both openings.
The simplest combination consists of the westernmost ring at ground level and a second ring southeast of it on a natural stone pillar. Place Link behind the first ring so that both openings are exactly on top of each other. If the distance is long, aim slightly above the center and shoot. If an arrow passes through both rings, the Sheem Dagoze Shrine rises. This concludes “Two in One”.
Sheem Dagoze Shrine – Lateral Thinker
There are two large Floor Switch in front of Link. Opposite there are several tilting platforms and two balls. Each Floor Switch changes two of the platforms. The balls must end up rolling into separate wells. With the first ball it is enough to step on the left switch; the ball rolls over the inclined surfaces into a trough.
The second ball requires some timing. First activate the right switch so that the ball starts rolling, then switch to the left switch in time and then to the right switch again. This causes the ball to be redirected several times from the lower platforms and lands in the other recess. If there is a ball in each hollow, the path to the priest opens.
Don’t go directly to Sheem Dagoze yet. Behind the lower ramps there is a side platform with a Treasure Chest. Glide down with the Paraglider. Inside lies a electric greatsword. An additional Floor Switch activates the platform for the return path. Then get the Spirit Orb.
Maritta Stable – Colossal Bones
For the final side quest completion of this tour, we travel to Maritta Stables north of the Hyrule Mountains. There Akrah, Onya and Garshon discuss the cause of the extinction of the three huge colossus whales. Speak to the brothers and start “Colossal Bones”. Photos of the skulls of the three large fossils from Eldin, Hebra and Gerudo, are needed.
We specifically visited the Eldin giant fossil in the previous chapter. If you haven’t taken a photo there yet, all you have to do is travel back briefly. The Hebra giant fossil is particularly easy to reach through the already completed To Quomo Shrine: Teleport yourself in or in front of the shrine, step out of the entrance and photograph the skull of the huge skeleton. For the third picture, teleport to the Hawa Koth Shrine at the Gerudo giant fossil near Tera and photograph the head there too.
When taking photos, the entire fossil doesn’t have to fit in the picture. What is crucial is that the game correctly recognizes the colossus whale or the relevant skull. Return to Maritta’s stable with all three photos and show them to the brothers. For “Colossal Bones” you will receive a Golden Rupee worth 300 Rupees.
All seven shrines at the Ridgeland Tower
For control purposes, all seven normal shrines in the tower region should be marked blue after this chapter. The Shira Gomar Shrine from Revali’s Ballad is not one of the seven regular shrines and has already been completed in the DLC section.
| Shrine | Task | Treasures |
|---|---|---|
| Zalta Wa | Following the bullets | Knight’s Bow |
| Toh Yahsa | Trial in the Storm / The Secret of the Cracks | Insulating Armor, Opal |
| Maag No’rah | Maag No’rah’s blessing | Silver Rupee |
| Shae Loya | The right moment | topaz, swallow/falcon bow |
| Mijah Rokee | The Night of the Blood Moon / A Modest Test of Strength | Ice Sword |
| Mogg Latan | With momentum | Forest Lance, Forest Bow, Golden Rupee |
| Sheem Dagoze | Two in one / lateral thinker | Electric Greatsword |
All 80 Koroks in the Tower of Hills area
With 80 Korok Seeds, the region is one of the most Korok-rich map sections Hyrule’s. Many are close to Satori Mountain, the Kukudja Gorge and along the Regencia or Tamiond River. Some puzzles are located directly on the borders of neighboring tower regions. We consistently use the tower region for our counting so that no seeds appear twice later.
| # | Location | solution |
|---|---|---|
| 1 | North of Manhala Bridge | Place the apple in the empty offering bowl of the two statues. |
| 2 | Dalith Forest, north of path | Place the apple in the free bowl of the statues. |
| 3 | Dalith Forest | Shoot a hanging acorn in a tree. |
| 4 | West of Dalith Forest | Climb the tall tree and lift the small stone. |
| 5 | Northwest of it | Shoot the acorn under or between the trees. |
| 6 | Slope between Dalith forest and Rutile Lake | Roll the large rock into the designated depression in the ground. |
| 7 | Southwest of Rutile Lake | Remove the pile of leaves on the lower ledge and lift the stone. |
| 8 | South of the Tamiond River | On the flat surface, lift the individual stone. |
| 9 | Northwest of Rutile Lake | Remove piles of leaves on the upper edge of the rock and lift the stone. |
| 10 | Western Rutile Lake | Throw a stone into the stone circle in the water. |
| 11 | Northeast Rutile Lake | Place two chained metal balls with the magnet module into the hollow tree stumps. |
| 12 | Northern Forest at Rutile Lake | Follow yellow flowers from one to five around the damaged tree. |
| 13 | North of Rutile Lake | Blast brittle rocks on the high plateau and lift stone. |
| 14 | Northeast of Rutile Lake | Move large rock with Stasis and lift the small rock underneath. |
| 15 | Right at the Mogg Latan Shrine | Remove piles of leaves and lift stone underneath. |
| 16 | West side of Satori Mountain | Complete the incomplete stone circle. |
| 17 | Satty Peak | Climb the cherry tree and lift the stone. |
| 18 | Between the three peaks of Satori Mountain | Follow the yellow flower sequence to the final white flower. |
| 19 | Eastern Satori Mountain | Activate tree stump and reach the target ring over the rocks in time. |
| 20 | East of Rutile Lake | Shoot an acorn in a fallen tree trunk. |
| 21 | Northwestern Niekel Plain | Activate the wind turbine and hit the balloons that appear. |
| 22 | Southeast of Sanidin Park Ruins | On the low ledge west of the Regencia River, lift the stone. |
| 23 | Northeast Satori Mountain | On the northern of the three peaks, blast rocks and lift a small stone. |
| 24 | East of Satty Peak | Climb the tall bare tree and examine sparkles. |
| 25 | Eastern Satori Mountain | Lifting stone in a hollow tree stump. |
| 26 | Northeast Satori Mountain | Shoot the acorn in the tree. |
| 27 | Northern Niekel Plain | Shoot an acorn in a smaller tree. |
| 28 | Northeastern ledge of Satori Mountain | Activate wind turbine and shoot balloons. |
| 29 | Northeast of Sanidin Park Ruins | Lifting stone on single tree near Regencia River. |
| 30 | Estuary of Tamiond and Regencia rivers | Retrieve metal cubes from the water and complete block patterns. |
| 31 | West of Jaad Bridge | Shoot the acorn in the tree. |
| 32 | Regencia River, east of Western Hyrule Plains | Lift a small stone right next to the water. |
| 33 | Bridge over the Regencia River | Follow the flower sequence over the bridge and pillars to the fifth flower. |
| 34 | Under the same bridge | Shoot down the balloon under the western side. |
| 35 | West bank of the Regencia River south of the Carok Bridge | Throw a stone into the stone circle in the water. |
| 36 | Center of the Western Hyrule Plains | Remove large stone slab with stasis and lift small stone underneath. |
| 37 | North of Kass near Sheem Dagoze | Capture moving sparkles on the floor. |
| 38 | Northeast of Sheem Dagoze | Touch flower groups from one to five. |
| 39 | North of Sheem Dagoze Shrine | Match three apple trees to the same fruit pattern. |
| 40 | North of the Tamiond River | Lift the stone in the grass on the upper edge of the rock. |
| 41 | Small island in the Tamiond River | Lift stone. |
| 42 | Southern Illumeni Plateau | Shoot down a balloon in a large tree. |
| 43 | East of Lake Illumeni | Track flower groups from one to five. |
| 44 | North of Lake Illumeni | Lift the stone on the high ledge above the Kukudja Gorge. |
| 45 | West side of Kukudja Gorge | Activate tree stump and reach the target ring at the southern end in time. |
| 46 | Penultimate large wind turbine in the Kukudja Gorge | Shoot hanging acorn. |
| 47 | Western end of Kukudja Gorge | Complete stone circle. |
| 48 | Western edge of Hyrule Mountains | Activate wind turbine and shoot balloons. |
| 49 | Gorge floor north of Lake Illumeni | Lift stone between several large rock pillars. |
| 50 | Northwest of Lake Illumeni | Move large stone slab with stasis and lift small stone underneath. |
| 51 | Southwest of Tabanta Bridge | Complete the metal block puzzle on the western canyon wall. |
| 52 | West side of Carok Bridge | Shoot the hanging acorn under or on the bridge. |
| 53 | Northeast of Carok Bridge | Activate tree stump and reach the target ring on the other side of the bridge. |
| 54 | North of Carok Bridge | Roll large rock down the slope into the hole. |
| 55 | Rock ledge north of Carok Bridge | Complete Metal Block Puzzle. |
| 56 | Ruins of the Royal Institute | Follow yellow flowers through the ruins. |
| 57 | East of the Royal Institute | Throw a stone into the stone circle in the water. |
| 58 | Small body of water north of the | Climb the tree and lift the stone. |
| 59 | West end of Deathbringer Gorge | Activate tree stump and reach the target ring between the overhanging rocks. |
| 60 | Resinblood Swamps | Use Cryonis to get to the water lily circle in the deep water and jump in. |
| 61 | Resinblood Swamps | Follow the sequence of flowers over the mushroom-shaped rocks. |
| 62 | East of the Harzblood Swamps | Activate tree stump and reach the ring on the neighboring mushroom rock. |
| 63 | Southeast of Thunder Plateau | Arrange three small stones appropriately on the highest mushroom rock. |
| 64 | Southwest of Thunder Plateau | Capture moving sparkles. |
| 65 | Northern Seres Plain | Shoot the balloon under the highest mushroom rock. |
| 66 | Central Seres Level | Shoot the balloon under a large mushroom rock south of the Hinox. |
| 67 | Southern Seres Plain | Activate tree stump on the largest mushroom rock and slide to the western target ring. |
| 68 | Western Seres Plain | Capture moving sparkles on the floor. |
| 69 | Kukudja Gorge Square | Investigate sparkles on the Rumpelgolf course flag. |
| 70 | Peak of Rhoam Mountain | Lift single stone. |
| 71 | Small pond north of Rhoam Mountain | Lift the stone at the top of the waterfall. |
| 72 | North of marathon registration | Shoot the acorn in the tree. |
| 73 | Kukudja Gorge north of marathon registration | Complete stone circle. |
| 74 | Northwest corner of Thunder Plateau | Blast rocks and lift the small stone behind it. |
| 75 | Summit of Tilio Slope | Activate tree stump and slide to the yellow target ring. |
| 76 | West of the highest point on Tilio Slope | Climb the completely bare tree and examine sparkles. |
| 77 | Northern Tilio Slope | West of the lightstone Stone Talus, lift the small stone between larger rocks. |
| 78 | Northwest of Tilio Slope | Blast brittle rocks east of Stone Talus and lift stone. |
| 79 | North edge of the tower region | Solve the metal block puzzle on the high edge of the Kukudja Gorge. |
| 80 | West of Digdok Suspension Bridge | On the high ledge east of Nephra Hill, pick up the single stone. |
Kilton Control in Hyrule Mountains
Before we check off the region, we check the individual overworld bosses. There is a blue Hinox in the Seres Plane, and a second blue Hinox in the Western Hyrule Plane. On the Satori Mountain south of the shrine, a Stalnox awakens at night. All three count for the later Order of Hinox. On the northern level of the Tilio Slope lies the Luminous Stone Stone Talus, which counts for the Stone Talus Order. If you have defeated these four opponents at least once, the important regional entries for Kilton’s later control are completed.
After defeating Ganon, the game marks already defeated overworld bosses with a star next to the life bar. Kilton will then tell you how many Hinoxes, Stone Talus and Molduga are still missing. You can find our complete preparation for this in the Kilton Guide.
Important locations for card scoring
Named places also count for the 100% map display. Therefore, check whether you visit Hyrule Mountains, Deathbringer Gorge, Dalith Forest, Rutile Lake, Satori Mountain, Sanidin Park Ruins, Niekel Plain, Ancient Stone Pillars, Western Hyrule Plain, Seres Plain, Thunder Plateau, Harzblood Marshes, Rhoam Mountain, Marathon Registration, Tilio Mountain, Tilio Slope, Tabanta Bridge Stable, Kukudja Gorge Square, Royal Institute Ruins and Washa’s Bluff. In some smaller places it is not enough just to fly high over them with a Paraglider.
100% status after Tower of Hills
The Tower of Hills region is now completely cleaned up. All seven regular shrines – Zalta Wa, Toh Yahsa, Maag No’rah, Shae Loya, Mijah Rokee, Mogg Latan and Sheem Dagoze – have been completed. The shrine tasks “Trial in the Storm”, “The Night of the Blood Moon” and “Two in One” have been completed. “Follow the Shadow” has been completed and Kaysa is now available as the fourth Great Fairy. After photographically checking the three Leviathan skeletons, the Side Quest “Colossal Bones” brings us another 300 Rupees.
With the insulation armor from Toh Yahsa we have the complete insulation set. Owners of the expansion pass have found the Ancient Bridle under the cherry tree on Satori Mountain and, together with the Ancient Saddle that they have already collected, have completed the Ancient Horse Equipment. The Lord of the Wild has been visited at least once or can be tamed the next time the mountain glows green. Bird People Challenge, Marathon and Rumpelgolf are also known and tried out as regional mini-games.
The two blue Hinoxes, the Stalnox on Satori Mountain and the Luminous Stone Talus on Tilio Slope, are finished for Kilton’s later monster orders. The checklist also covers all 80 Koroks of the tower region. The Hyrule Mountains are no longer a transit area, but are completely closed off.
Next up is the Woodland Tower. We’ve already covered the Korok Forest, the Master Sword and the three Korok Trials in detail, but outside of the Lost Woods are the Deubran Ruins, several shrines, regional Hinoxes and Stone Talus, stable tasks, Koroks and other map locations open. We will close these gaps in the next 100% chapter.